This is the stage where I optimise URLs, add canonical tags and 301 redirects, ensure cross-browser compatibility, create a custom 404 page, validate all the code, and optimise any images for faster load times.
Based in Ilkeston, Derbyshire, and serving the Nottingham and Derby area, I provide website services, including development, for small to medium businesses.
1. Ensure URLs are Meaningful and User-friendly
Page URLs, also known as the web page address, must be kept short.
Words in the URL should be separated by a hyphen. Unnecessary words and conjunctions should be subtracted.
Ensure that the top level domain part of URLs are always consistent. This means that there is a hierarchy or “drill down” page structure. Sometimes this is referred at as website architecture.
It’s a good idea to keep these URLs (and all other details of each page) in a spreadsheet like this, especially if it’s an eCommerce website that’s being built.
2. Add Canonical Tags to All Pages
The canonical tag tells Google how to display the URL of any given page in search engine results pages (SERPs).
For example, the canonical URL can be quickly added inside WordPress page or post settings:
And that page looks like this in the search results:
I could get rid of the www from the canonical if I wanted:
Which would instead look like this in the search results:
3. Add Any 301 Redirects
If a website is being redesigned, there’s a good chance the individual page addresses of the new website will be different.
In this case 301 redirects makes old addresses forward to the new addresses. This is important if some of your “old” website pages are still indexed in Google and need to point to the new site.
There’s another reason to use 301 redirects.
Sometimes, it’s helpful to give your customers an easy-to-remember link.
For example, the following (long) link points to a specific Google webpage for reading or writing Ilkeston Web Design reviews:
https://search.google.com/local/writereview?placeid=ChIJR-QanQnseUgRRFBCdtiwmnU
That’s too long though, so I set up a shorter URL which redirects to that long link. Here it is:
ilkestonwebdesign.com/google
A short link can point to anything you want, not just Google reviews, as shown in the video below:
4. Check Cross-browser Optimisation
The site needs to look the same across all browsers. There’s quite a few to take into account but the popular ones are Chrome, Firefox, Edge, Safari and Opera.
Internet Explorer is the worst and web designers hate it! Thankfully fewer people use it today but you cannot totally ignore it.
5. Create Custom 404 Error Page
Do you know what a broken link is? It refers to someone clicking a link on a website, expecting to load a particular page, but alas! the page has either been removed or has had the URL changed.
What you want for these situations is a so-called 404 page.
This is a page telling the website visitor what has happened and offering a solution to the problem.
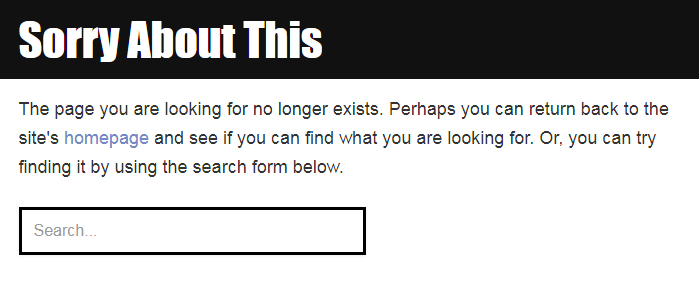
Here’s my 404 page:

A custom 404 page can attempt to solve the problem
6. Check that Visitors Receive Confirmation After Every Action
Whether it’s sending an email using a contact form or subscribing to an email subscription list, the website always needs to tell the visitor if they were successful.
This is particularly important for eCommerce sites, where there should be instructions and comments before and after tasks.
When an email is sent, for example, either a little note with a personal message should appear (“thanks for emailing us, we’ll be in touch”) or a new page should load with the same or a similar message.
7. Validate and Optimise CSS
CSS is the code used to make things look the way they look on the site. This code can be condensed (minified) so it loads faster.
The minified code runs all on one single line as opposed to their being line breaks for each statement of code.
8. Optimize Image Format, Dimensions and File Size
At this stage, images may need to be tweaked to improve load speed. Images that are too big in their dimensions will add unnecessary loading time.
What tends to happen is that someone will add a new image to their website without using Photoshop to resize it first.
A massive picture can be resized on the site using HTML, but that doesn’t take away the fact that the photo/graphic could be, say, 5 or 6 MB. Too big!
Then there’s the image format.
A PNG can have a transparent background, which is handy if you want to experiment using different background colours on the website. A JPEG just has a solid colour background.
The video below demonstrates this. Although the video doesn’t mention it, there are even better, faster-loading image formats like WEBP and SVG.
New Website Guide
Menu
- ⚖️ Quote Submission
- 🗃️ Preparation
- ♟️ Planning
- 📰 Layout
- 🖇️ Content Preparation
- 🧩 Content Integration
- 📐 Design
- 🪛 Technical and Usability
- ⚙️ Putting It Online


